Introduction
This quick start guide is intended to show you the basics of using PC-Lint Wizard. It assumes that you have Gimpel PC-Lint and PC-Lint Wizard already installed on your PC. You can download PC-Lint Wizard here.
Launching PC-Lint Wizard
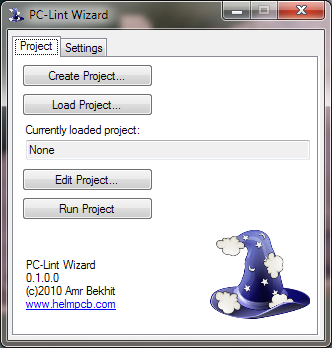
To launch PC-Lint Wizard, go to Start Menu->Programs/All Programs->Helm PCB->PC-Lint Wizard->PC-Lint Wizard. You will be presented with the main screen, as shown below:
Global Lint Settings
The first thing to do after installing PC-Lint Wizard is to configure the global Lint settings. To do so, open the Settings tab at the top of the main screen and then click on “Edit Global Settings”. You will be presented with the following dialog:
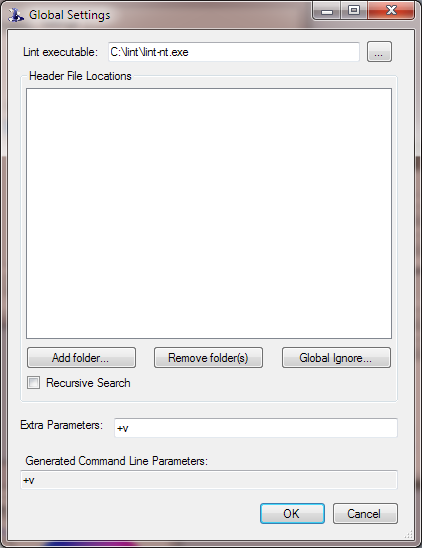
This dialog allows you to configure settings that affect all projects created using PC-Lint Wizard.
Check that the default Lint executable location is correct. If not, click on the ellipsis button and browse to the location of the Lint executable.
If required, any global header file locations can be added here. To do so, either click the “Add folder…” button and browse to a specific folder, or drag and drop one or more folders from Windows Explorer onto the list. To easily add all subfolders, simply check “Recursive Search”. This applies to both the “Add folder…” button and drag and drop operations. To remove folders from the list, select one or more folders (drag select, or using Ctrl and Shift) and click on “Remove folder(s)” or press Delete on the keyboard.
Any extra command line parameters which you may want to use when running PC-Lint can be added under “Extra Parameters”.
You can prevent unwanted files and folders from being added during drag and drop and other add operations by configuring the Global Ignore list. Click on “Global Ignore…” to open the following dialog:
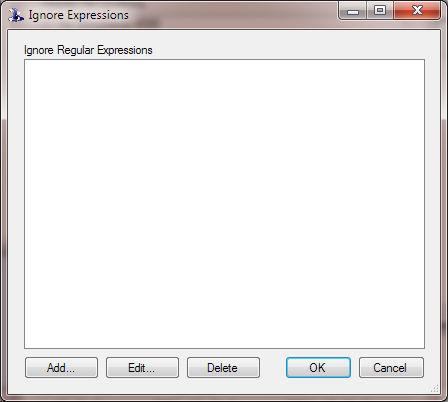
PC-Lint Wizard compares file and folder paths against the regular expressions in this list. If they match any of the expressions they are not added. For example, to ignore all SVN configuration files and folders, add \\[._]svn to the list.
Compiler Settings
The next step after configuring the global settings is to add compiler settings. From the PC-Lint Wizard main screen, open the settings tab. A list of currently configured compilers is displayed at the bottom. Click on “Add…” to create a new compiler. The following dialog will be shown:
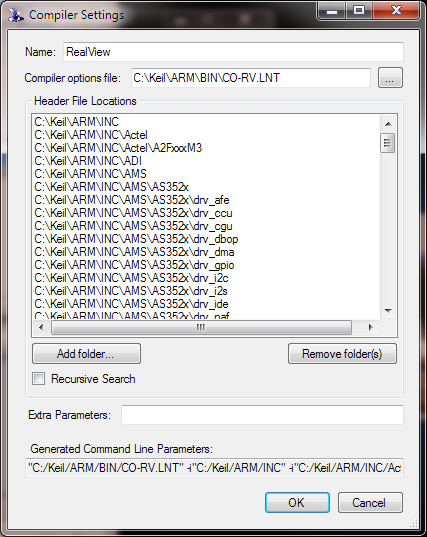
This dialog is very similar to the global settings dialog. To configure a compiler:
- Name: Enter a unique name for the compiler.
- Compiler options file: If the compiler vendors provide a PC-Lint options file, browse to its location, otherwise leave this box blank.
- Header File Locations: Add any compiler header file locations here. Like the global settings dialog, folders can be added by click on “Add folder…” or dragging and dropping folders on to the list. Check “Recursive Search” to add all subfolders.
- Extra parameters: If the compiler requires any extra Lint command line options, enter them here.
Creating a Project
From the main screen, click on “Create Project…”. You will be asked for a location to save the project file. After that, the Project Settings dialog is shown:
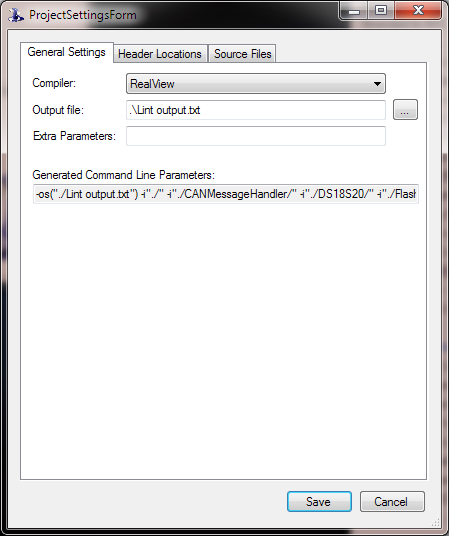
In the General Settings tab are the following options:
- Compiler: Select the compiler that this project uses from the list.
- Output file: Browse to the location where you would like the Lint output file to be created.
- Extra Parameters: If your project requires any extra Lint command line options, add them here.
The Header Locations tab allows you to specify the location of the project’s header files, similar to the compiler settings and global settings dialogs.
The Source Files tab allows you to specify your project’s source files. Adding files can be done in three ways:
- Click on “Add file(s)…” to browse to a folder and add select one or more files to add.
- Click on “Add folder…” to add all source files in a folder.
- Drag and drop files and folders from Windows Explorer on to the list. When dragging folders, source files in that folder are added.
Like with other dialogs, checking “Recursive search” allows the source files in subfolders to be added.
Paths to source files, header folders and the output file are stored relative to the location of the project file.
Click on Save to save the project and return to the main screen.
Running a Project
From the main screen, click on “Run Project”. PC-Lint Wizard will use the global, compiler and project settings to launch PC-Lint. An output file will be created at the location specified in the project settings.